
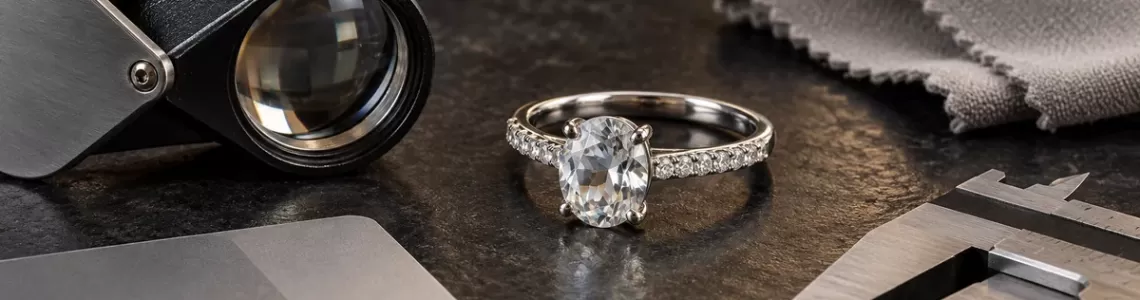
Inspect a ring as soon as it arrives, before you wear, clean, resize or alter it. Save the listing and written terms, photograph the unopened package and ring, compare the received piece with the disclosed material, dimensions and setting, then check the stone, setting, shank and finish in bright neutral light. If a stone visibly moves, a prong is bent or missing, the band is cracked, or the ring differs materially from the order, stop handling it and contact the seller or a qualified jeweler.
An arrival inspection is evidence preservation, not a home appraisal. A loupe and photographs can reveal a question worth escalating, but they cannot prove metal purity, identify a gemstone, detect every treatment or certify workmanship. Do not scratch, bend, pry, shake, magnet-test or chemically test a finished ring. Those actions can damage the piece, weaken a return claim and still produce an unreliable conclusion.
Start with the listing, order and return terms
Before opening the package, save the product page, order confirmation, invoice, delivery notice and the seller's return, resizing, warranty and service terms. The U.S. Federal Trade Commission advises online shoppers to read the complete description, understand refund conditions and keep receipts, messages and promises. A product page can change after purchase, so a dated copy gives you a reference for what was represented when you ordered.
Record the exact item, size, metal description, stone description, treatment disclosure, finish, dimensions, quantity and included documents. Separate a verified statement from an assumption. "Sterling silver," "925," "lab-grown sapphire," "rhodium plated" and "approximately 8 mm" are claims that can be compared with the package and paperwork. Words such as "premium," "heirloom" or "brilliant" are not measurements or independent test results.
Read our online jewelry buying checklist for the pre-purchase record, and our guide to returning jewelry bought online for a separate explanation of condition evidence and policy deadlines. This article focuses on the physical arrival check.
Open and document the package without altering the ring
Use a clean, dry table with a soft cloth beneath the package. Keep tape, labels, inserts, bags, tags and protective film until the inspection is complete. Photograph the outer package before opening if it is crushed, punctured, wet or resealed. Then photograph the inner packaging and the ring from the top, both sides and the underside.
A phone camera is useful for documenting condition, but it is not a gemological instrument. Use the main camera rather than a beauty filter, include a neutral background, avoid digital zoom and take one frame with a ruler only if the ruler can rest beside the ring without touching it. Keep the original files and timestamps. Do not edit color or erase reflections in the evidence copy.
If the parcel is missing an item, contains a different ring or shows obvious transit damage, pause the inspection and follow the seller or carrier process. Avoid wearing the ring "just to see" if doing so could scratch, soil or deform it. The goal is to preserve the condition in which it arrived.
Use controlled light and inspect the whole ring first
Begin with the unaided eye in diffuse daylight or a bright neutral lamp. Rotate the ring slowly over a soft surface. Look at the overall symmetry, stone orientation, setting height, shoulder alignment and circularity of the shank. A handmade object can show minor variation, and perspective can make a centered feature look tilted, so compare several angles before drawing a conclusion.
Next, use a clean 10x loupe if you have one. Hold the loupe near your eye and bring the ring toward focus; do not press the lens against the stone or metal. GIA's jewelry-manufacturing material emphasizes systematic observation of workmanship clues, but professional assessment also considers construction, tools, magnification and experience. A buyer's loupe check should produce a clear question, not a self-issued quality certificate.
Look for discontinuities: a sharp burr, split seam, deep tool mark, lifted coating edge, open gap, crushed channel wall, missing bead, bent prong or stone sitting at an unusual angle. Distinguish those from ordinary polishing lines, casting texture in a hidden area or reflections that move when the ring moves. Photograph a concern from a normal view and a close view, then describe its location in plain language.
Check the setting according to how it holds the stone
A setting is a structure, not decoration alone. Prongs bend over the stone; bezels surround more of its edge; channel walls hold a row between metal rails; pavé and bead settings use small metal elements around small stones. Our guide to prong, bezel and channel settings explains those differences before you compare the received piece.
For a prong-set center stone, compare the prongs around the ring. They need not look mathematically identical in a handmade setting, but each should appear to contact and cover the intended stone edge. Look for a prong that is visibly lifted, shortened, cracked, flattened sideways or separated from the stone. GIA notes that bent or broken prongs reduce security and can expose a stone to loss or chipping.
For a bezel, inspect whether the metal rim appears continuous where the design calls for it, and note any obvious split or lifted section. For channel-set stones, look along both rails for a crushed, opened or sharply irregular area. For pavé or bead-set sections, check for an empty seat, visibly displaced stone or a bead that appears absent. Do not probe any area with a pin or blade.
Do not reproduce a jeweler's setting test by pushing the stone with a hard tool. If you notice movement during gentle normal handling, hear a repeatable rattle while simply rotating the ring over the cloth, or see a gap between stone and setting, stop. A qualified jeweler can determine whether the movement is real and how the design should be secured. Do not keep wearing the ring to "monitor" a suspected loose stone.
Inspect the stone without trying to identify it
Compare the number, shape, color range and approximate placement of stones with the listing. Look for a conspicuous chip, missing corner, surface-reaching fracture, loose fragment or residue around the setting. Clean reflections can resemble cracks, inclusions can resemble dirt, and a facet junction can resemble a scratch. Change the angle and light before recording what you see.
Do not infer identity or treatment from color, sparkle, bubbles, a flashlight, a phone macro image or a single inclusion. Natural, treated, synthetic, composite and imitation materials can overlap visually. CIBJO disclosure guidance treats treatment and special-care information as facts that should be communicated in sale documents; it does not suggest that a buyer can resolve them from a photograph.
Use the written description as the evidence boundary. If a listing names a specific gemstone or treatment but the invoice is silent or contradictory, ask for clarification in writing. Review gemstone hardness, toughness and stability before cleaning or wearing a stone-set ring. A durable stone can still be vulnerable when it is loose, chipped, treated or exposed by the setting.
Check the shank, inside profile and size marks
View the band from the top and side. Note a visible crack, deep crease, sharp unfinished edge, severe oval distortion or an area that is unexpectedly thin compared with the opposite side. A ring can be intentionally tapered, asymmetrical or textured, so compare the structure with the listing rather than demanding perfect mirror symmetry.
Inspect the inside for a readable size or quality mark if one was represented, but remember that a stamp is a claim, not independent authentication. The FTC advises buyers to understand precious-metal descriptions and markings. Our guide to 925 stamps and hallmarks explains why a mark must be assessed with seller identity and the full description.
Do not force an arriving ring over the knuckle. Fingers change with temperature and time of day, and wider bands can feel tighter than narrow ones. If the fit is clearly wrong, preserve the condition and consult the stated exchange or resizing process. If you are considering alteration, first read whether a sterling silver ring can be resized; stones, plating, construction and design can limit the work.
Evaluate finish and color with realistic expectations
Compare polish, texture, oxidation and plating with the listing in more than one neutral light. Highly polished silver reflects the room and camera, while dark backgrounds can make it appear blacker and warm lamps can make it look yellow. Oxidized recesses, antiqued details and deliberate hammering should not be mistaken automatically for dirt or damage.
Record a large bare patch, blister, peeling edge, unexpected adhesive, deep scratch or color transfer before cleaning. Do not polish an oxidized or plated ring to test it; polishing can remove an intentional finish or thin coating. Do not use toothpaste, bleach, abrasive powder or a chemical dip. GIA warns that cleaning method depends on the gemstone and setting, and that insecure settings can worsen during cleaning.
If the ring arrived with fingerprints or light packing dust but no structural concern, ask the seller for material-specific care before using any product. The safest next step can be a soft dry cloth rather than a stronger cleaning experiment. Keep the first photographs even if the concern later proves harmless.
Decide among wear, clarification, return or professional inspection
A normal inspection ends in one of four paths. If the ring matches the order and has no observed warning sign, store the arrival record and follow the disclosed care. If a fact is unclear but the ring is stable, ask the seller for written clarification. If the item differs materially from the order or policy expectations, preserve it unworn and follow the stated return process. If a structural concern may put a stone or wearer at risk, stop wearing it and obtain a qualified inspection.
Immediate stop-wear signs include a visibly moving stone, bent or missing prong, open bezel, displaced channel wall, cracked shank, sharp burr that can cut skin, or a stone with an obvious fresh chip at the setting edge. These signs do not prove who caused the condition or what repair is required. They justify protecting the piece from further use until the responsible seller or jeweler evaluates it.
When contacting a seller, be specific and neutral: identify the order, name the location of the concern, attach an overview and close-up, and ask what step the written policy requires. Avoid modifying the ring before receiving instructions. If warranty or service language matters, compare it with our warranty versus service-plan checklist; coverage, exclusions and required inspections differ by written terms.
A practical arrival checklist
- Save the product page, order, invoice, delivery record and written policies.
- Photograph the unopened package, inner packaging and ring from several angles.
- Compare item, size, metal, stone, treatment, finish and dimensions with the order.
- Inspect the whole ring in neutral light before using magnification.
- Check prongs, bezel, channel or bead setting without poking or bending metal.
- Record any stone movement, gap, chip, missing element, crack or sharp edge.
- Do not clean, polish, resize, scratch-test or wear a disputed ring.
- Contact the seller or a qualified jeweler promptly within the applicable written policy.
Frequently asked questions
Should I shake a ring to test whether the stone is loose?
No deliberate stress test is needed. If you hear or see movement during gentle normal handling, stop wearing the ring and seek a qualified inspection. Do not shake, tap or pry the setting.
Can a phone macro photo prove a cracked gemstone?
No. Reflections, facet junctions, inclusions, surface marks and actual fractures can look similar in a photograph. A clear image can document a concern, but identification and diagnosis may require professional examination.
Does a 925 stamp prove that the ring is sterling silver?
No. It is a quality claim that should be considered with the seller, invoice and other evidence. Independent testing, when needed, should use appropriate professional methods.
Should I clean the ring before photographing it?
Not if there is a dispute or structural concern. Cleaning can change the condition and may harm a treated stone, coating or loose setting. Photograph first and ask for material-specific instructions.
Are uneven prongs always a defect?
Not necessarily. Design, stone shape, hand finishing and viewing angle can create visible differences. A prong that is lifted, broken, not contacting the intended edge or associated with stone movement deserves professional review.
Can I wear the ring while waiting for the seller to reply?
Avoid wear if condition, fit, return eligibility or stone security is in question. Wear can add scratches or damage and may make the original condition harder to document.
What should I do if the ring size is wrong?
Do not force it or immediately resize it. Preserve the received condition, verify the ordered size and use the seller's written exchange or resizing process.
When is a professional inspection appropriate?
Use one when a stone moves, the setting appears bent or open, the shank is cracked, the stone may be chipped, the material claim needs testing or the proposed repair could affect stones, plating or structure.
References
- GIA: Complete Guide to Engagement Ring Settings
- GIA: Jewelry Detectives and Workmanship Clues
- GIA: How to Protect Your Diamond Engagement Ring
- GIA: How to Protect Your Diamond from Chipping
- GIA: How to Clean Your Diamond Jewelry
- FTC: Online Shopping
- FTC: Buying Platinum, Gold, and Silver Jewelry
- CIBJO: Coloured Stone Blue Book
Evidence boundary: This guide describes conservative arrival checks and recordkeeping. It does not authenticate a metal or gemstone, grade a ring, diagnose a crack, assign responsibility, determine legal rights, prescribe repair or guarantee safe wear.
Leave a Comment